Monday, February 18, 2019

Sugar free, keto, and vegan macadamia chocolate bars


It has been a hot minute since I have posted here but happy to be back. 

Recently, CasaClark has gone keto since the 40's belly spread is really quite unattractive and unhealthy.  It's been a smooth transition but R still has a sweet tooth and missed having a "sugary" treat after his dinner.  I came across this recipe in Sweet & Savory Fat Bombs by Martina Slajerova page 33 and decided to give them a try for R. 

Verdict?  These are really delicious!  I gifted some to a vegan friend for her birthday and she loved them.  They are easy to make and are room temp stable thanks to the cacao butter.  Without further adieu.....

Dark Chocolate with Macadamia Nuts
4 oz cacao butter
1/2 c (1.4 oz) unsweetened, organic, and fair trade cacao powder
1/3 c (1.8 oz) powdered erythritol
1 tsp sugar free vanilla extract or 1/2 tsp vanilla powder (I actually add both for extra vanilla flavor)
1 to 2 pinches of salt to taste, very fine
7 drops sweet leaf vanilla creme liquid stevia
1.5 oz toasted macadamia nuts chopped (optional)
12 drops food grade organic orange oil (optional)


 Toast and chop your macadamia nuts.  Set them aside.


Melt your cacao butter on the lowest setting you have so you don't burn it.  I am lucky that my stove top has a melting setting.


Once the cacao butter is melted use a sieve to press the cacao powder and erythritol into the melted cacao butter.  Add the vanilla, salt, and stevia and whisk until smooth.  Once the ingredients are incorporated add the macadamia nuts and stir to combine.


Place the mixture into molds and let it set at room temperature, about 1 hour.


I like to use unbleached parchment paper and double sided tape to wrap my bars.  I place the chocolate bites into a glass jar.


Once my chocolate is wrapped I like to label it with what it is and with a best by date, which in this case is 3 months after being made. 

These are delicious and creamy chocolate bars/bites that satisfy the sweet tooth and keep you on track!

Enjoy!


Wednesday, September 24, 2014


Thai Iced Tea

Lately we've been obsessed with having iced tea ready to go and this sweet treat is going to be an occasional go to for us; it has tons of sugar in it and we don't like having too much of that around here.  I adapted a recipe that I found on this blog, White on Rice.  I knew I would NEVER buy the pre-made stuff with those additives and yellow dye but appreciated their attempt at mimicking a Thai restaurant splurge.  Here it goes.....

Thai Tea Mix
2 tsp loose black tea (I use Davidson's Ceylon OP loose black tea that I got from Amazon) or 2 black tea bags
2 tsp loose rooibos tea (I use Davidson's loose rooibos tea that I got from Amazon) or 2 rooibos tea bags
2 disposable paper filter tea bags (I just put the bags filled with the tea into the composter when I'm done)
4 c water
1/2 c sugar
1/2 Tbsp (1 1/2 tsp) of vanilla bean paste (I use Nielsen Massey that I got from Amazon)

Bring the water to a boil and add the teas, sugar, and vanilla bean paste.  Lower the heat and simmer for about 3 min; remove from heat and steep for at least 30 min (I steeped for 1 hour but only because I was busy making dinner and kind of forgot about it).

Thai Tea Assembly
Pre-made tea mix
Half and half (I use organic)
Glasses filled with ice

Pour the tea mix into the glasses and fill almost to the top.  Splash some half and half into it, stir it around, and enjoy.


Monday, July 8, 2013

Ryan's Sangria

My husband is a genius with computers but his talents also reveal themselves in the kitchen.  I present you with the BEST Sangria recipe on the planet.  Sorry, no pic.


1 bottle of red wine
1 lemon juiced
1 orange juiced
1 lime juiced
2 Tbsp sugar
splash of OJ
2 shots Gin
2 shots Peach Brandy
1 c sliced strawberries
1 can diced pineapples
1/3 c coconut milk
2 Tbsp vanilla extract or 1 vanilla bean sliced in half
1 (2 liter)  bottle ginger ale ( I buy Fever Tree but buy enough to make 2 liters)

Mix all alcohol, juices, and fruit slices together. Place in the sun in a closed jar for 3 to 5 days. Strain liquid from solids.  Discard solids.  Add coconut milk and ginger ale. Serve over ice.


This recipe is easily doubled or tripled if you'd like.  It's really amazing what fermentation does to this drink.

Wednesday, November 9, 2011

Friday, July 15, 2011

Homemade Cajeta


All good things must come to an end, and thus I say farewell to Vegan town.  Although I visit regularly for culinary inspiration,  you won't be the only town I visit.  With that said, here's a recipe for some delicious cajeta, a delicious goat milk Latin caramel candy.  Use it in coffee, over ice cream, in ice pops; really the sky is the limit.  It is SUPER sweet so please proceed with caution when using.

I am super lucky to get my hands on 2 gallons of raw goat's milk every month.  I have homemade feta in the fridge right now, and needless to say, it is awesome.  If you live in the Central Valley of CA I highly recommend that you contact Meg Dickey and sign up for their herd share program.  The milk those goats make is beyond delicious.  If you can't get your hands on goats milk, you could use whole milk just make sure it is not ultra-pasteurized or it just won't work.  Without any further delay....

Cajeta
Modified from a recipe in Home Cheese Making by Ricki Carroll

2 Tbsp cornstarch
1/4 tsp baking soda
12 c whole raw goat's milk
3 c sugar
1 vanilla bean split down the center
1 small piece of canela (cinnamon stick)

I added the vanilla and cinnamon myself.  I just love the flavor of dulce de leche so much I thought it would make a nice addition.  Don't feel as if you have to add, omit the last two ingredients if you are just not that into them.

Add 1 cup of the milk into your stock pan along with the cornstarch and baking soda.  Using a whisk, incorporate the starch and soda until no lumps are visible.  Add the rest of the milk.  Over med-high heat, bring to boil, stirring occasionally.  Once it boils, remove the cinnamon stick and vanilla bean if using and stir constantly until you get a caramel consistency.  I usually make sure that the sauce coats the back of my wooden spoon.


Pour into clean jars, cover with a clean dish towel, and allow to it to come to room temp.


Once this happens place the lids on top and store in the fridge up to a month.  If you plan on using it over ice cream, heat it in microwave or place jar in a bath of hot water for a bit.  Enjoy!

Monday, April 4, 2011

Korean Fried Tofu in a Sweet-Soy Garlic sauce


This is one delicious meal!  I made it as part of our Soup Sunday fare and it was a huge hit.  I wouldn't recommend using this batter technique unless you plan on tossing the tofu in some sort of sauce.  I have made mole tofu this way and it was out of this world!  I hope you make this for your family and tell me what you think.

Korean Fried Tofu
 America's Test Kitchen

3 quarts vege oil ( I use a fry-daddy so I use much less)
1 1/2 c cornstarch; place 1 c in a bowl and 1/2 c in another 
1 x 16oz block of extra firm organic tofu ( no gmo's would be ideal), drained and cut into strips; see below
1 c water ( add to the bowl with 1 c cornstarch in it and mix to combine)
2 scallions, sliced thin and the bias; garnish
1 Tbsp fresh cilantro leaves minced; garnish


This is my high tech way of  removing the excess liquid from the tofu.  I place a kitchen towel down and then place my tofu onto it.  I cover with another kitchen towel and place a brick over the top towel and directly on top of the tofu.  I let it sit for at least 1/2 hour.

While this is draining I make the sauce........

Sweet-Soy Garlic Sauce
America's Test Kitchen

*Place all of the ingredients into a saucepan as it will need to go into one anyway ; no need to dirty up any extra dishes*

1/2 c sugar
1/4 c tamari
1/4 c water
3 medium garlic cloves pressed through a garlic press
1 Tbsp rice wine vinegar
1 tsp sriracha ( I use 2 tsp)

Heat over medium heat until syrupy, about 5 min.  Let cool to room temperature.

Now that the tofu is drained and the sauce is made it's time to fry it up.  Place the oil in a dutch oven with a candy / fry thermometer attached.  Wait until the oil reaches 350 degrees.  Or in my case heat the oil in a fry-daddy or deep fryer or your choice.


You'll need to dredge the tofu strips in the 1/2 c of cornstarch first and then place them in the water / cornstarch mixture you made earlier.  Fry them in batches until they are golden brown.  I remove excess oil by placing the tofu onto paper grocery bags then place into a bowl.


Once the tofu has been completely fried you top with the sauce and gently stir to combine.


And there you have it.  Place this delicious tofu over some rice and top with the garnishes and you'll have a delicious meatless meal.

Friday, October 22, 2010

Hibiscus Martini

This month I am hosting my book club and wanted to serve martinis.  I will be serving a pear, cardamom, clove, and orange peel martini as well as this red beauty.  This hibiscus martini is perfectly balanced with alcohol, sweet, and sour (fresh lime juice).  The hardest part of this drink is making the hibiscus syrup but once it's made you'll have syrupy goodness for a while.

Hibiscus Martini (a Casa Clark original recipe)

2 oz hibiscus syrup (recipe follows)
2 oz vodka
1 oz fresh lime juice ( read this article and it'll illustrate what I mean by fresh juice; thanks E for sharing this)
hibiscus flower in syrup for garnish (optional)

Place all your ingredients except for garnish into a shaker and shake until the outside of shaker is cold.  Place your garnish at the bottom of the martini glass and pour cold drink over the garnish.  Enjoy.


Hibiscus Syrup
I actually found this recipe online.  It calls for fresh hibiscus flowers but I used dried Jamaican flowers that I purchased at the Latin market (RN) for about $3.  If you have seen this syrup at Amazon be prepared to pay $11 for a bottle of 8.8 oz.  You not only save money but have enough ingredients to make it over and over again.  The flowers are super pretty  in flutes topped with champagne (I'll post a pic once the girls come over on Saturday).

20 dried whole hibiscus flowers
1/2 c fresh lemon juice
2 c water
2 c sugar

Place your flowers and lemon juice in a microwave proof bowl and nuke for 2 min. on high.


Add the water, sugar, and hibiscus flowers in lemon juice to a pot and bring to a boil.  Reduce the heat and simmer until the mixture has reduced by 1/3.  Allow the syrup to come to room temperature.  Use a slotted wooden spoon to retrieve the flowers or strain flowers from syrup into a clean bowl.


Gently place the flowers into a clean mason jar and top with the syrup so that they are completely covered ( I prefer to use a wide mouth version because it's easier to get the flowers out when you want to use them).  Add the surplus syrup into a clean mason jar and cover both jars.  Place in refrigerator and store for up to one year.  You can also make hibiscus vodka with it. 

Tuesday, October 5, 2010

Let them eat vegan Pho


Casa Clark has gone vegan.  It's been coming for a while and it's been a good thing especially for me.  R and C aren't too convinced yet  and occasionally ask for eggs, cheese, and milk (although C has been drinking lots of my almond milk lately).  It's been a challenging culinary adventure but I'm not one to shy away from a fight.

One of my most favorite things in the world is the wonderful Vietnamese rice noodle soup Pho.  The only problem is that as a recent vegan I know there is fish sauce lurking in the savory depths and was bummed that I couldn't have it especially since it's gotten a bit chilly out there.  I was looking at my p.v. (pre- vegan) cookbooks and found a Pho recipe in my Cook's Illustrated The Best International Recipe cookbook and liked some and changed some.  You'll die at the depth of flavor in the broth and have a healthy dinner to boot.  The secret to this broth is time, so start it the night before or before you head out to work.  Trust me, it's worth the wait.

Vegan Pho Broth (adapted from Cook's Illustrated)
You'll need a dutch oven and crock pot for this one.


4 tsp vege oil ( I didn't actually measure the oil and just added enough to cover the bottom of my dutch oven)
4 medium onions sliced
8 medium garlic cloves, pressed
2 lemon stalk with tough outer edges removed and sliced thin; only use the bottom 5" of it
20 c water
4 Tbsp tamari
4 Tbsp sugar
8 star anise pods
8 whole cloves
a handful of dried shiitake mushrooms
a piece of Kombu for dashi cut in half
mushroom soy sauce or tamari to taste
1 piece of lemon grass with outer skin removed and mashed a bit with the back of a knife ( to add to crock pot)

Add the oil to your dutch oven and warm up; add the onions and cook until caramelized.  This is a very important step because it will add color and flavor to the broth.


Add the garlic and lemon grass and cook until fragrant.  Add the water, tamari, sugar, dried mushrooms, and kombu.  Now you can add the star anise and cloves but I place 4 star anise and 4 cloves into a tea pouch ( so you'll make 2 pouches) and then add.  It makes it easier to get them out later.  It'll make sense.


Place the lid on your dutch oven and bring to a boil.  Reduce the heat a bit and allow to simmer for 10 min.  Now here is where the magic happens.

Before you strain your broth into the crock pot be sure to dig out one of your spice pouches and the kombu; set aside.  Strain the rest of your broth into the crock pot and add the reserved spice pouch, kombu, and the macerated lemon grass.   Cook it on low for at least 8 hours.  Season to taste with more tamari or mushroom soy sauce as needed.


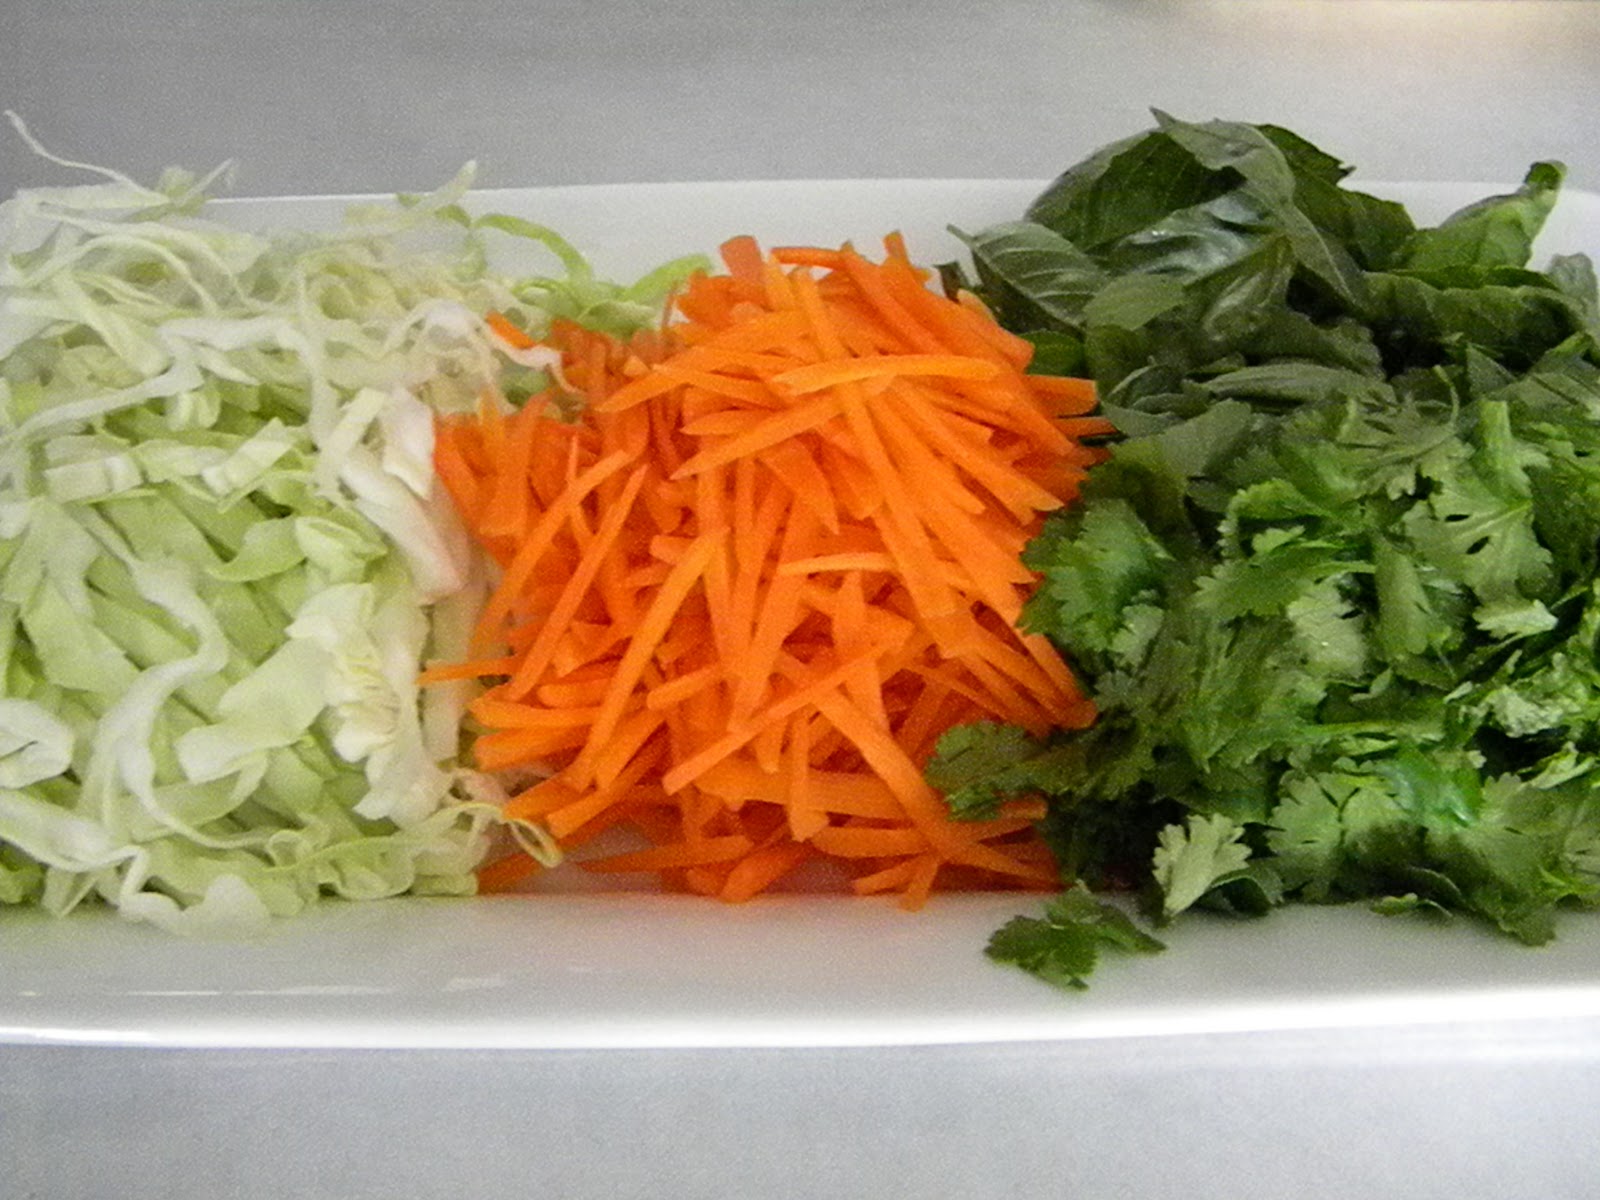
As far as the garnishes go, the sky's the limit.  I personally like to use bean sprouts, chopped tofu, carrots, green onions, sliced bok choy, sliced jalapenos, sliced cabbage, cilantro leaves, rice noodles, and Thai basil of course.  You place your garnishes into your bowl and then top with the hot broth.  Add some Sriracha and you're in business.  This is super healthy and delicious comfort food that you'll crave throughout the winter.

Sunday, July 25, 2010

What to do with your CSA part 7

Greek style Quinoa

Although date night was extraordinarily fun last night the food was heavy and I woke up feeling blah.  I wanted to make us a healthy and delicious lunch.  As I was flipping through my latest Saveur issue (Aug/ Sept 2010; the Greek issue) I came across Ladolemono, which is the Greek version of a lemon sauce.  With this sauce as inspiration I created a delicious meal packed with protein and delicious Greek flavor.

Greek Style Quinoa
1 butternut squash, peeled, seeded, and diced
1 eggplant ( from my garden) diced
8 baby carrots, diced
1 cucumber (from my garden) peeled, seeded, and diced
kalamata olives, handful which were quartered
8 oz feta cheese, divided
mint leaves cut into ribbons
2 c of quinoa, rinsed under water
4 c of homemade vege broth
 Ladolemono sauce ( recipe follows)

After rinsing the quinoa under water for about 1 min I placed into a saucepan with the broth.  I covered and brought to a boil on med-high heat.  Once it came to a boil, I lowered the heat to low and allowed it cook.

While the quinoa is cooking place your butternut squash, eggplant, and carrots into a pan with warm oil over med- high heat until the veges are browned and cooked through.  Remove from heat.

Once the quinoa is done cooking place it into a bowl.  Add the cooked veges, cucumber, olives, and 4 oz of the feta, crumbled.  Add 1/2 of the ladolemono sauce and toss to coat.  Place the quinoa on a plate and garnish with some crumbled feta and the mint leaves.  Delicious!

Ladolemono sauce
Again, this recipe is from the Saveur Aug/ Sept 2010 issue.  Super tart and good.

1/4 c fresh lemon juice ( thanks again Prietos for the lemons although this is the last of them)
1/2 c extra virgin olive oil
1 Tbsp dried oregano
1 Tbsp Dijon mustard

Place all of the ingredients into a jar and shake until combined.

What to do with your CSA part 6

Grilled Vege Sandwich

I love the summer veges.  They are so good and quite satisfying.  I have yet to grow tired of zucchini, summer squash, or eggplant; maybe I'm a weirdo.  I thought these sandwiches would make a hearty summer dinner which they did.  I've remade these with the same delicious results.  Feel free to substitute with any seasonal veges.  The pic is a bit yellow because the fluorescent lighting in the kitchen at night is dreadful, sorry.

Grilled Vege Sandwich
1 large eggplant, cut into thin slices
2 large zucchinis cut into medium thick slices
1 large patty pan sliced
baby carrots slice in half
bell peppers, seeded and sliced
onion, sliced
cooked bacon slices (optional)
2 small peaches pitted and sliced
olive oil
salt and pepper to taste
1 small package of blue cheese at room temperature
havarti cheese slices (Costco)
bread ( I prefer sour dough)


I grilled the veges on my electric grill, but feel free to grill outside.  Before being placed onto the grill the veges were placed in a large bowl and covered with olive oil, salt, and pepper.  I tossed them in the oil and seasonings with my hands until they were well coated.  I grilled until the veges were tender but not overly done.  Once they are cooked place them in another bowl or platter.  Grill the peach slices.  I didn't coat the peach slices because I wanted their natural sugars to do the caramelizing and I didn't want them to taste like oil.  Once the peaches are done remove from heat and set aside.


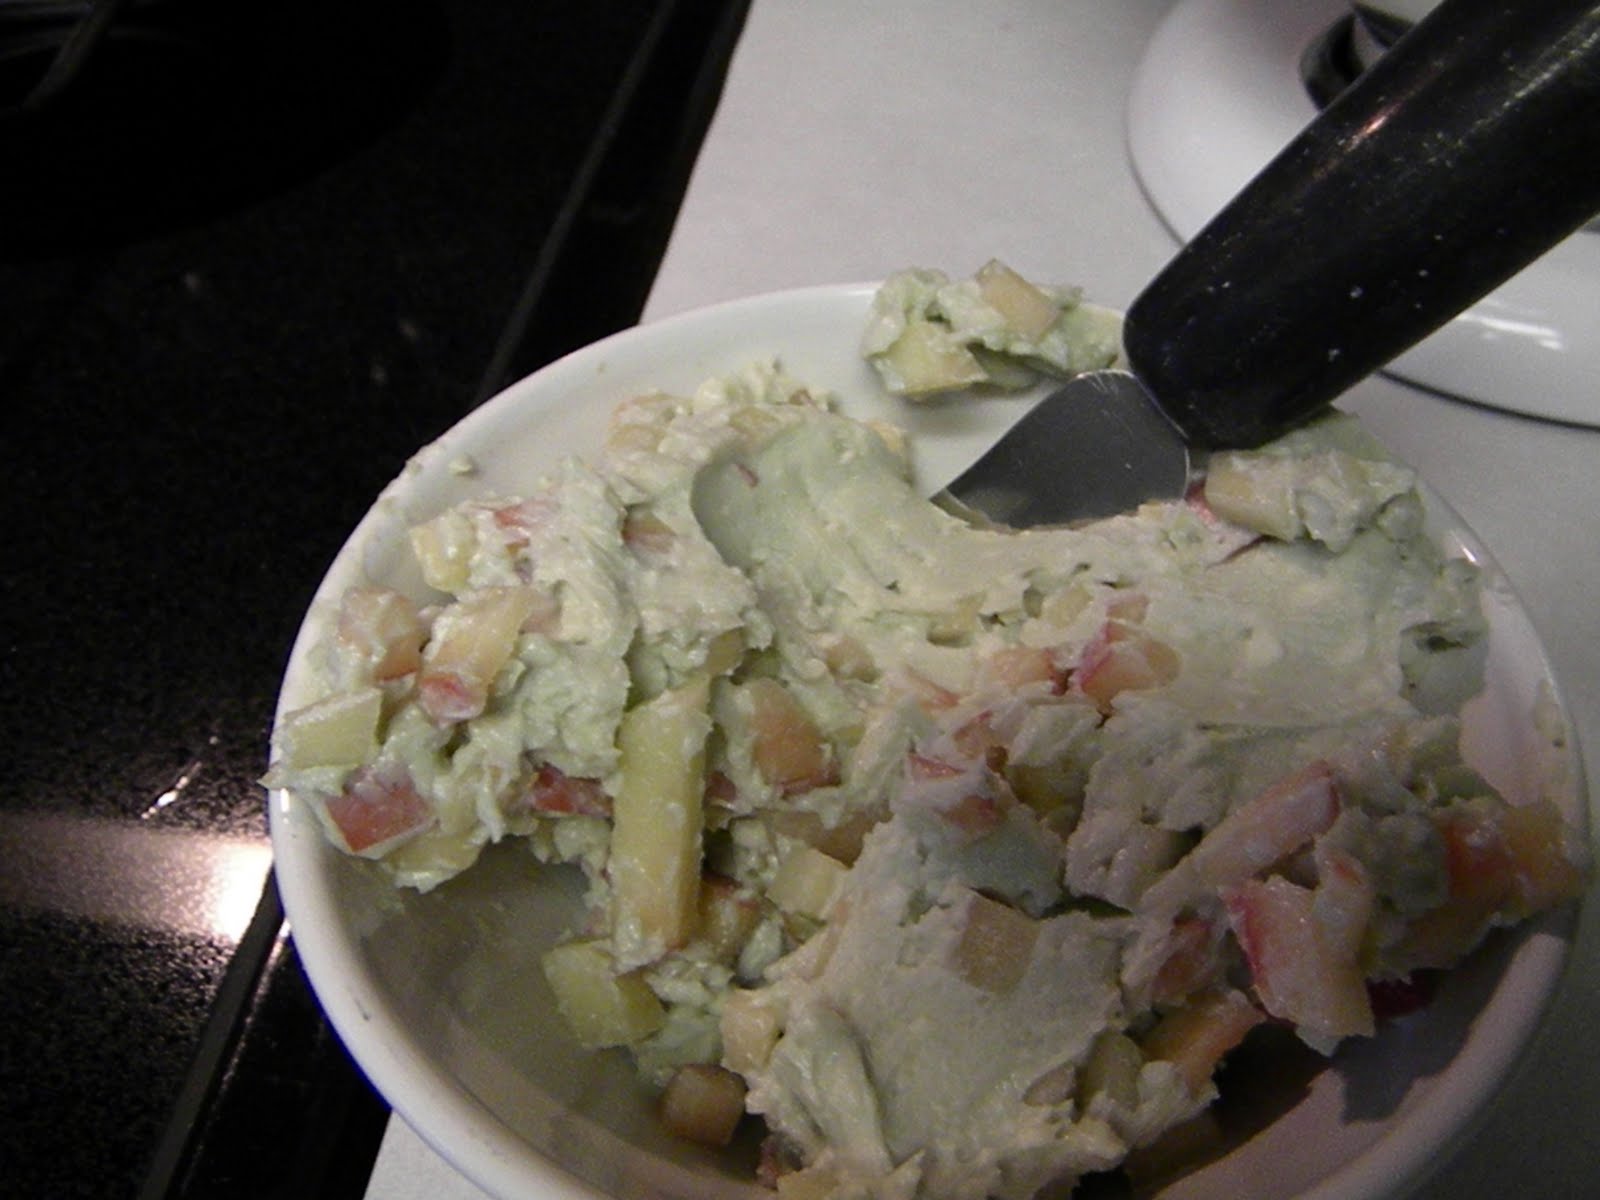
Crumble the blue cheese into your stand mixer, and using the paddle mix the cheese until smooth and spreadable.  I decided to dice a peach and mix it into the smooth cheese.  I had it so I did it but this is not necessary.


Brush olive oil on your bread and place onto grill.  Cook for 2 min and flip over.  Add the havarti slices and grill until the havarti begins to melt.  Place onto a plate.  Add the blue cheese onto the non-havarti slice and spread using a spreader.  Now you're ready to top.


On the blue cheese side place your grilled peaches.  On the havarti side place your grilled veges how you'd like them.  Place the peach half onto the havarti half and slice in half.  Enjoy!

What to do with your CSA part 5

Spring Rolls

Spring rolls are a Clark staple during the summer.  I love how tasty these are.  I will also include the Peanut Sauce recipe that really makes these shine.  It's seriously the best sauce I've ever had and now you'll know it too.

Spring Rolls
1 package of spring roll wrappers
fine rice vermicelli noodles, cooked and cooled according to the package instructions
carrots, julienned
cucumbers, peeled, seeded, and julienned
green onions; only use the green parts, julienned
spinach chopped ( I used a custom salad mix that I made at the farmer's market )
cilantro leaves
vege chicken strips ( or real chicken if you prefer )
basil, mint, and purple basil cut into ribbons and mixed in a bowl together
1 bowl of warm water
kitchen towel


Start by soaking the wrapper in the bowl of warm water until softened but still able to keep its shape.  I place on plastic cutting board but you can place onto your clean counter top.  I take my kitchen towel and dab any excess water on the side that faces up.  Now you're ready to fill.

Start with your carrots and cucumber.  Don't put too much and be sure to place on the side closest to you.


Add the spinach (salad mix) and green onions.


Add the cilantro leaves, the basil - mint mixture, and top with a piece of soy chicken.


Add the rice noodles and roll it up like a burrito; tucking in the sides as you roll.  Be sure to place it seam down if you plan on cutting it.  Use a sharp knife and just press down onto the spring roll.  Place the roll onto a platter or plate.  Repeat until you have the desired amount of rolls.  Dip your roll into the peanut sauce before enjoying.


Hoisin-Peanut Dipping Sauce
 I found this recipe in Cooks Illustrated.  I love this sauce

1/4 c hoisin sauce
1/4 c creamy peanut butter ( I use and prefer the extra chunky)
1/4 c water, plus extra as needed
2 Tbsp tomato paste
1 tsp Sriracha
2 tsp vege oil
2 medium garlic cloves, pressed
1 tsp red pepper flakes

Place the vege oil into a pan over med heat.  Once warm, add the garlic and red pepper flakes and cook until the garlic is fragrant.  Add the rest of the ingredients and stir to combine.  Remove from heat and allow to cool.  Add more water if the sauce is too thick.

What to do with your CSA part 4

Empanadas

Because I had plenty of left overs from the tostadas I decided to make empanadas with them.  These are great because they are easy to make and you can freeze them to cook on another day.  I should have taken pictures of the steps, but I am going to go ahead and assume that you can read and follow directions.  As far as the fillings are concerned, the sky's the limit.  I also made some with chopped peaches tossed with homemade jam but didn't take pictures of them so didn't include.  Be creative!

Empanada Dough
I actually like to use a dough recipe from Cook's Illustrated for this.  It's easy to make with few ingredients.

18.75 oz of AP flour
1 Tbsp sugar
1 1/2 tsp salt
12 Tbsp unsalted butter, cut into 1/2" cubes and frozen for 10 min
1 1/4 c ice water
Filling of your choice, chilled
1 large beaten egg

In your food processor process the flour, sugar, and salt together until combined.  Scatter the pieces of butter and pulse until the butter resembles coarse crumbs, about 16 pulses.

Add some of the water and process; keep adding water and continue processing until the dough comes together.  Place in plastic wrap and flatten into a disk for at least 2 hours or overnight.

To make empanadas:  Flour your counter or work space slightly.  I like to keep the dough in the fridge and only work with one small piece at a time.  Pinch a piece of dough and roll out to 1/8" thick circle.  Place the filling into the half closest to you but don't overfill.  Add some water using your finger around the edges of the circle and bring the other half towards you until you form a half moon.  Use a fork to crimp the edges and place onto a parchment lined baking sheet until it's filled ( usually 6 to 8 empanadas).  Place in the fridge for 30 min and preheat your oven or place into your freezer and freeze for at least 8 hours then place into a Ziploc bag.


Preheat your oven to 425 degrees (have it preheat while empanadas are in the fridge) for at least 30 min.  Brush the empanadas with the beaten egg and cook for about 25 min switching and rotating your tray half way in between, or until golden brown.  Enjoy!

Wednesday, July 7, 2010

What to do with your CSA part 3

Tostadas

These yummy tostadas were full of summer veggie deliciousness and most importantly topped with grilled halloumi cheese.  They were simply marvelous.  Our tostadas were layered (in order) as such: beans, Mexican rice, meat and veges, fresh salsa, and grilled Halloumi cheese.  I also should mention that I chose to fry small flour tortillas instead of the standard corn tortilla.

Beans: I just used organic re fried beans because they were in the pantry and it saved me from having to make them from scratch.

Mexican rice: 1 onion diced, 4 cloves of garlic, 2 cups of long grain white rice, 1 can of organic tomato paste, 4 c water and salt to taste.  Cook the onion in pan until transparent over medium high heat, then add garlic and rice and cook until the rice starts to brown a bit. Add the tomato paste and water then season to taste.  Reduce the heat to low, cover the pan, and cook for about 20 min or until liquid is evaporated.

Meat and Veges: 1 large patty pan diced (from our garden), 2 zucchinis diced, 1 large eggplant diced, 8 baby carrots diced, 4 yukon gold potatoes diced and pre-cooked, 1 x 12oz bag of morning star meal starters / crumbles, home made chili powder.  Cook the patty pan, zucchinis, egg plant, and carrots in pan with olive oil and salt until cooked but still crunchy.  Put in bowl and set aside.  Add the crumbles and cook in pan with olive oil until defrosted and cooked.  Add the cooked potatoes season with salt and add the chili powder to taste.  Add to the bowl of veges and stir to combine.  Set aside.

Fresh Salsa:  1 white onion diced, 2 jalapenos finely minced, 1 bunch of cilantro chopped (store bought), 4 to 5 early girl tomatoes diced, 2 nectarines diced (or other seasonal KMK fruit), the juice of 1 lemon, and salt to taste.  Combine all of the ingredients and season to taste.

Grilled Halloumi cheese:  I bought this amazing Greek cheese at Pita Kabob, but look for it at your favorite Mediterranean market.  I preheated my electric grill to med, sliced the cheese, drizzled it with olive oil, and  grilled each slice for about 2 min per side.  You'll get a nice crust on this slightly salty and creamy cheese.  Absolute heaven.

Enjoy!

What to do with your CSA part 2


Muffins

Muffins are a great way of using the fruit that you get in your CSA.  I've chosen the Lemon Cornmeal Blueberry Muffins because I used the corn from the box to make my own cornmeal, and I've chosen the Gingered Bran Fruit Muffins because I used CSA fruit.  These are both delicious for breakfast or dessert.  We had ours with homemade Mochas too which was super yummy.  You can candy your citrus peels, dehydrate your fruit to extend the life of it, and make your own cornmeal.  Once you have these things made you can enjoy them past the season through out the year.


Lemon Cornmeal Blueberry Muffins
These are essentially the cornmeal dessert that I posted not too long ago but instead of using the blueberry sauce, I opted to include the blueberries into the batter instead.


glaze
1 1/2 c (packed) powdered sugar
3 TBSP fresh lemon juice (you may need more)
candied lemon peel (optional)

muffins
1 1/2 c AP flour
1/3 c homemade corn meal
3/4 c sugar
3 1/2 tsp baking powder
3/4 c frozen blueberries
1/2 tsp salt
1 c buttermilk
2 large eggs beaten lightly
2 large lemons zested
3/4 tsp vanilla extract
1 stick butter melted and cooled

Preheat your oven to 400 degrees.  Spray or butter your 12 count muffin / cupcake pan and set aside.

Combine the flour, cornmeal, sugar, baking powder, and frozen blueberries in a bowl and set aside.  Combine the buttermilk, eggs, lemon zest, vanilla extract, and butter in a bowl.  Add to the flour mixture and fold until just combined; DO NOT OVER MIX.

Spoon the batter in prepared muffin pan and bake in oven for 20 to 25 min or until golden brown and a toothpick placed in center comes out clean.  Place on a cooling rack for 5 min and remove the muffins.

Combine the glaze ingredients and add more lemon juice if too thick.  Top the muffins with the glaze and add the candied lemon peel before the glaze sets.


Gingered Bran Fruit Muffins
This is actually a revised version of a recipe that I found in my mom's Better Homes and Gardens.  I like that this recipe is simple and that you can use whatever fruit is in season.  It also lends itself to fresh or dehydrated fruit.

2 c AP flour
1 c packed brown sugar
4 tsp baking powder
1 tsp ground ginger
1/2 tsp salt
1 1/2 c whole bran cereal
1 1/2 c whole raw milk
1 1/2 c chopped fresh or dehydrated fruit (seasonal fruit is always best; I used dehydrated KMK apricots)
2 eggs lightly beaten
3 Tbsp canola oil

Topping
2 Tbsp almonds
candied lemon peels, diced
candied ginger, diced

Preheat your oven to 400 degrees.  Spray or butter your 12 count muffin / cupcake pan and set aside.

Combine the flour, brown sugar, baking powder, ground ginger, and salt in a bowl, make a well in the middle, and set aside.

Combine the cereal and milk in a bowl and allow to sit 5 min.  Add the apricots ( or fruit of choice), eggs, and oil and stir to combine.  Add to the well of flour mixture and fold to combine.  Again, do not over mix.

Spoon mixture into your muffin pan and top with the almonds, lemon peels, and candied ginger.  Bake in the oven for 20 min or until golden brown and a toothpick inserted comes out clean.


Homemade Mochas
Fresh brewed coffee
Cocoa powder (Dutch processed preferred)
Raw milk

Place 1 Tbsp of the cocoa powder on the bottom of your coffee cup.  Top with coffee and fill cup half way.  Stir to combine.  Top with the milk and once again stir.

Enjoy!

Saturday, July 3, 2010

What to do with your CSA part 1

Yellow Gazpacho with Fresh Relish


I get asked what do I do with my CSA, so in an effort to answer that I've decided to blog for a week with the meals that we make from our box.  I really enjoy being part of  The Farmer's Daughter CSA because I know my farmers, the food that I get is top notch and organic, and it allows me to be really creative in the kitchen.  All of the ingredients are organic unless otherwise noted.  This lovely soup was both our lunch and dinner which I served with sour dough havarti cheese toast.


Fresh Relish (Casa Clark original recipe)
2 early girl tomatoes, diced
2 carrots finely chopped
purple basil leaves, cut into ribbons
mint leaves, cut into ribbons
Kingsburg gold tomatoes, halved
diced red onion (this onion also goes into the gazpacho so don't use too much)
extra virgin olive oil
salt

I placed all of the ingredients into a bowl, swirled with some extra virgin olive oil, and seasoned with salt to taste.  I didn't give you exact amounts because I didn't measure and just threw it all in.  You'll figure it out.


Yellow Gazpacho (Casa Clark original recipe)


I used what I had in the box and left overs from last week's box to make this.  I weighed the ingredients and am providing you with exact measurements of what went into the soup.  The pic is of the vege landscape before they were blended into creamy and refreshing goodness.

2 lb 3.5 oz of Carolina gold heirloom tomatoes, quartered
1 lb 3.5 oz purple bells, sliced
1 lb cucumbers (these were store bought)
1 red onion diced (the onion used in the relish; I hadn't used too much of it so threw it in)
2 cloves of garlic quartered
8 oz baby carrots
1 lb tomatillos husked, washed, and halved or quartered
9.2 oz apricots (weight with pits inside) pitted and halved
1 Tbsp sherry vinegar
1/2 lemon, juiced
salt and pepper to taste
extra virgin olive oil
water

I used my blender for this because I have one that is awesome, but feel free to use a food processor.
I blended in batches and once I placed some of the veges into the blender I added a bit of olive oil and a splash of water to make the veges easier to blend.  Once they're blended pour them into a sieve over a bowl.  Fold the vege pulp until no more juice is extracted, repeat with the rest of the veges.  On your last batch be sure to blend for a full minute and just incorporate into the soup without straining.  Mix to combine.  Add the vinegar, lemon juice, and season to taste.  Refrigerate at least 2 hours before serving.  Place into bowls and top with the relish.  Enjoy!

Tuesday, June 22, 2010

Lemon Cornmeal Cake with Lemon Glaze and Crushed-Blueberry Sauce


I made this DELICIOUS cake for our Dad's on Fathers Day and wanted to put it on the blog because it was so very good.  I also made a corn ice cream to go with it, which complemented the cake beautifully.  Cake from Bon Appetit April 2009 and the ice cream is a Casa Clark original.

Glaze
1 1/2 c (packed) powdered sugar, sifted
3 Tbsp (or more) fresh lemon juice

Cake
1 1/2 c AP flour
1/3 c yellow cornmeal (I used my homemade cornmeal)
3/4 c sugar
3 1/2 tsp baking powder
1/2 tsp salt
1 c buttermilk
2 large eggs, lightly beaten
2 large lemons zested
3/4 tsp vanilla extract
1 stick unsalted butter, melted, cooled
Crushed - Blueberry Sauce

Line the bottom of a 9" cake pan with parchment paper and butter.  Preheat oven to 350.

Combine the flour, cornmeal, sugar, baking powder, and salt in a bowl and set aside.

Combine the buttermilk, eggs, zest, vanilla, and butter in a bowl and add to the flour mixture.  Don't mix together, but just gently fold the liquid into the dry ingredients and stop once everything is moist.

Scrape the batter into the prepared pan and spread evenly.  Bake for 30 min or until sides pull away a bit.
Make the glaze by combining the sugar and lemon juice together until smooth.  If it is too thick add more lemon juice to achieve the consistency you want.

Immediately run knife around edges, place cooling rack on top, and with oven mitts on invert the cake onto the rack.  Add the glaze and spread to within 1/2" of the edge.  Cool Completely.  Top with Blueberry Sauce when served.

Crushed Blueberry Sauce
3 c fresh or frozen blueberries, thawed, and divided in half
2/3 c golden brown sugar
2 tsp fresh lemon juice
1 large lemon zested

Combine 1 1/2 c of blueberries, sugar, lemon juice, and zest in a sauce pan on cook over med heat until it comes to a simmer.  Reduce heat to med - low and continue cooking until the berries are very soft and liquid is syrupy, stirring often, about 7 min.  Remove from heat; add remaining blueberries.  Using the back of a spoon gently press the blueberries onto the side of the pan and crush.  Can be made up to 2 days ahead and stored in the refrigerator.

Corn Ice Cream (Casa Clark original recipe)

1 1/2 c heavy cream
1 1/2 c raw milk
1 c sugar
4 ears of sweet corn, kernels removed, and pulped (scrape with the back of knife once the kernels have been removed)
12 egg yolks
1/2 tsp of freshly grated nutmeg
1 1/2 tsp of vanilla extract

Bring the cream, milk, sugar, and corn to a simmer in a pot over medium heat.  Meanwhile, beat the egg yolks in stand mixer on medium speed for 4 min.  Temper the eggs with 1/3 of the milk mixture and add to the pot.  Continue cooking until thickened.  Strain the mixture into a clean bowl, cover with plastic wrap (directly on the custard), and place in ice bath.  Cool completely.  Once cooled add the nutmeg and vanilla and follow manufacturers instructions on your ice cream maker.  Freeze at least 4 hours and enjoy.

Wednesday, June 9, 2010

Wheat and Oat Pancakes

The kids didn't have school today, so Chloe and Gabe had these for breakfast. They loved them. Why use a mix when it's so easy to make at home.  A Vege Times Magazine delight. Enjoy!

3/4 c quick cooking oats (old fashioned ok too)
1 1/2 c + 2 Tbsp well shaken buttermilk, divided (3/4 c batches)
3/4 c whole wheat flour
1 1/2 tsp baking powder
3/4 tsp baking soda
1/2 tsp cinnamon
1/8 tsp fresh grated nutmeg
1/2 tsp salt
1 large egg, lightly beaten
2 Tbsp unsalted butter, melted
1 Tbsp packed brown sugar

bananas or other fresh fruit for garnish.

Soak oats in 3/4 c buttermilk for 10 mins (if using old fashioned soak for 15).

Meanwhile, whisk together flour, baking powder, baking soda, cinnamon, nutmeg, and salt in a large bowl.

Stir egg, butter, brown sugar, remaining 3/4 c + 2 Tbsp buttermilk, and oat mixture into dry ingredients until just combined.

Heat griddle to 275 and lightly brush with melted butter. Working in batches pour batter onto griddle and cook until browned and cooked through.

Bon appetit.

Garden News


I had to get out of the house this morning after my disastrous and traumatic first bout on Foodie Fights.  Although the Garden is not big and is not located in one specific spot, it felt good to feed the plants and see what new and exciting food is growing in our back yard.  So far it's been going well and for next year we plan on removing those large decorative rocks and making some raised beds.  Some of the lovely things that I saw and that made me feel better are:


Our first broccoli is coming out.  Now, I went into this without actually knowing if broccoli is a good summer crop.  If you have any input please share.  I  am sure that I'll have to keep an eye on it to ensure that it doesn't bolt.


The Black Russian Heirlooms are flowering.  I never actually buy the seeds for these guys, just buy the tomatoes at the Farmer's Market, cut it in half, squeeze out the pulp onto a sieve, clean everything out except the seeds, dry them in the sun, and plant.  It's awesome.  I hope that I am able to do that from my own crop.

This year we have 15 different Heirloom tomatoes, squash, peas, broccoli, cantaloupe, peppers, sun flowers,  radishes, chard, kale, and carrots.  Although it sounds like a lot, it's in such small quantities that I doubt it'll make a dent on our KMK budget.   Regardless, it's been a fun experience for the family and I; especially today, also a nice escape from my thoughts.